uThing::iPH Calibration procedure
Two-point pH Calibration
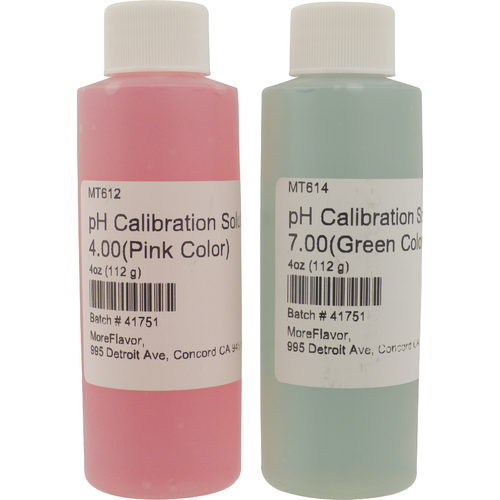 pH calibration buffers
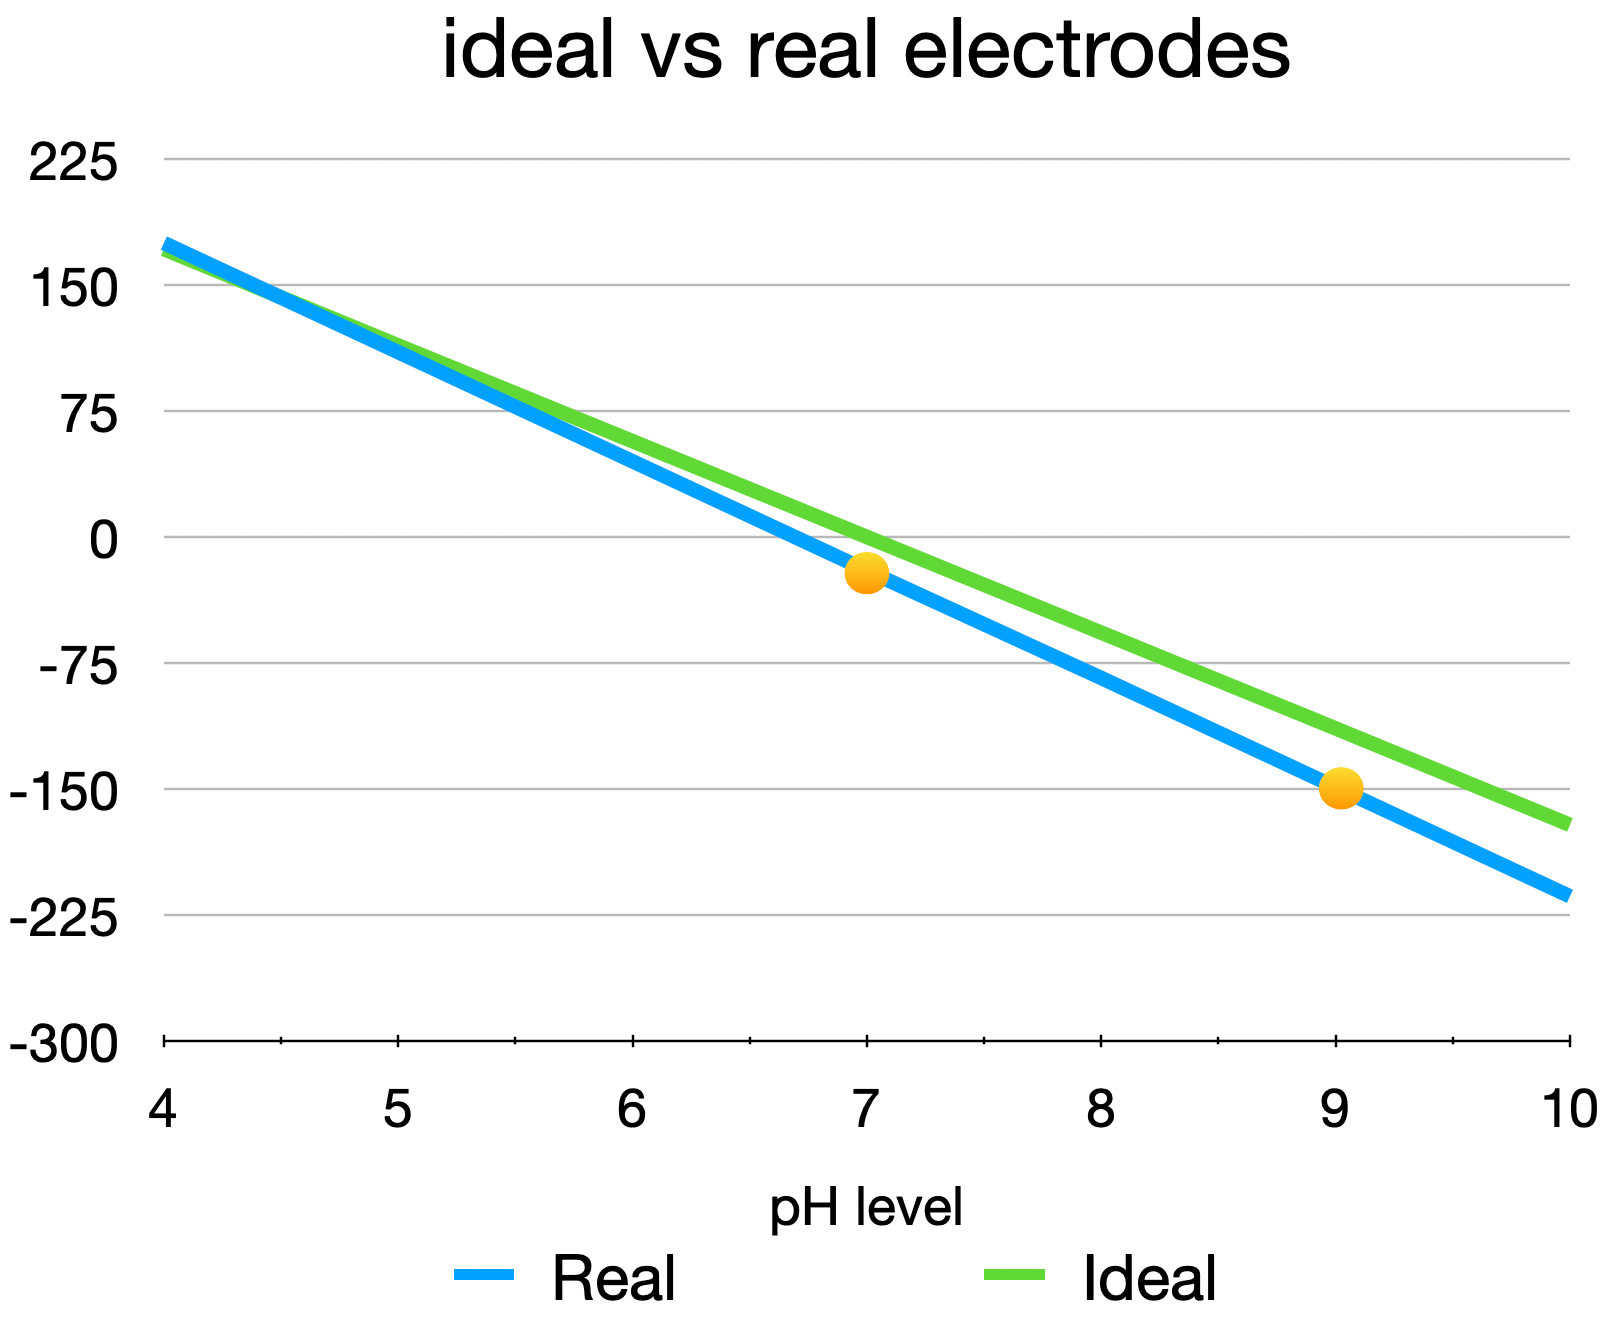
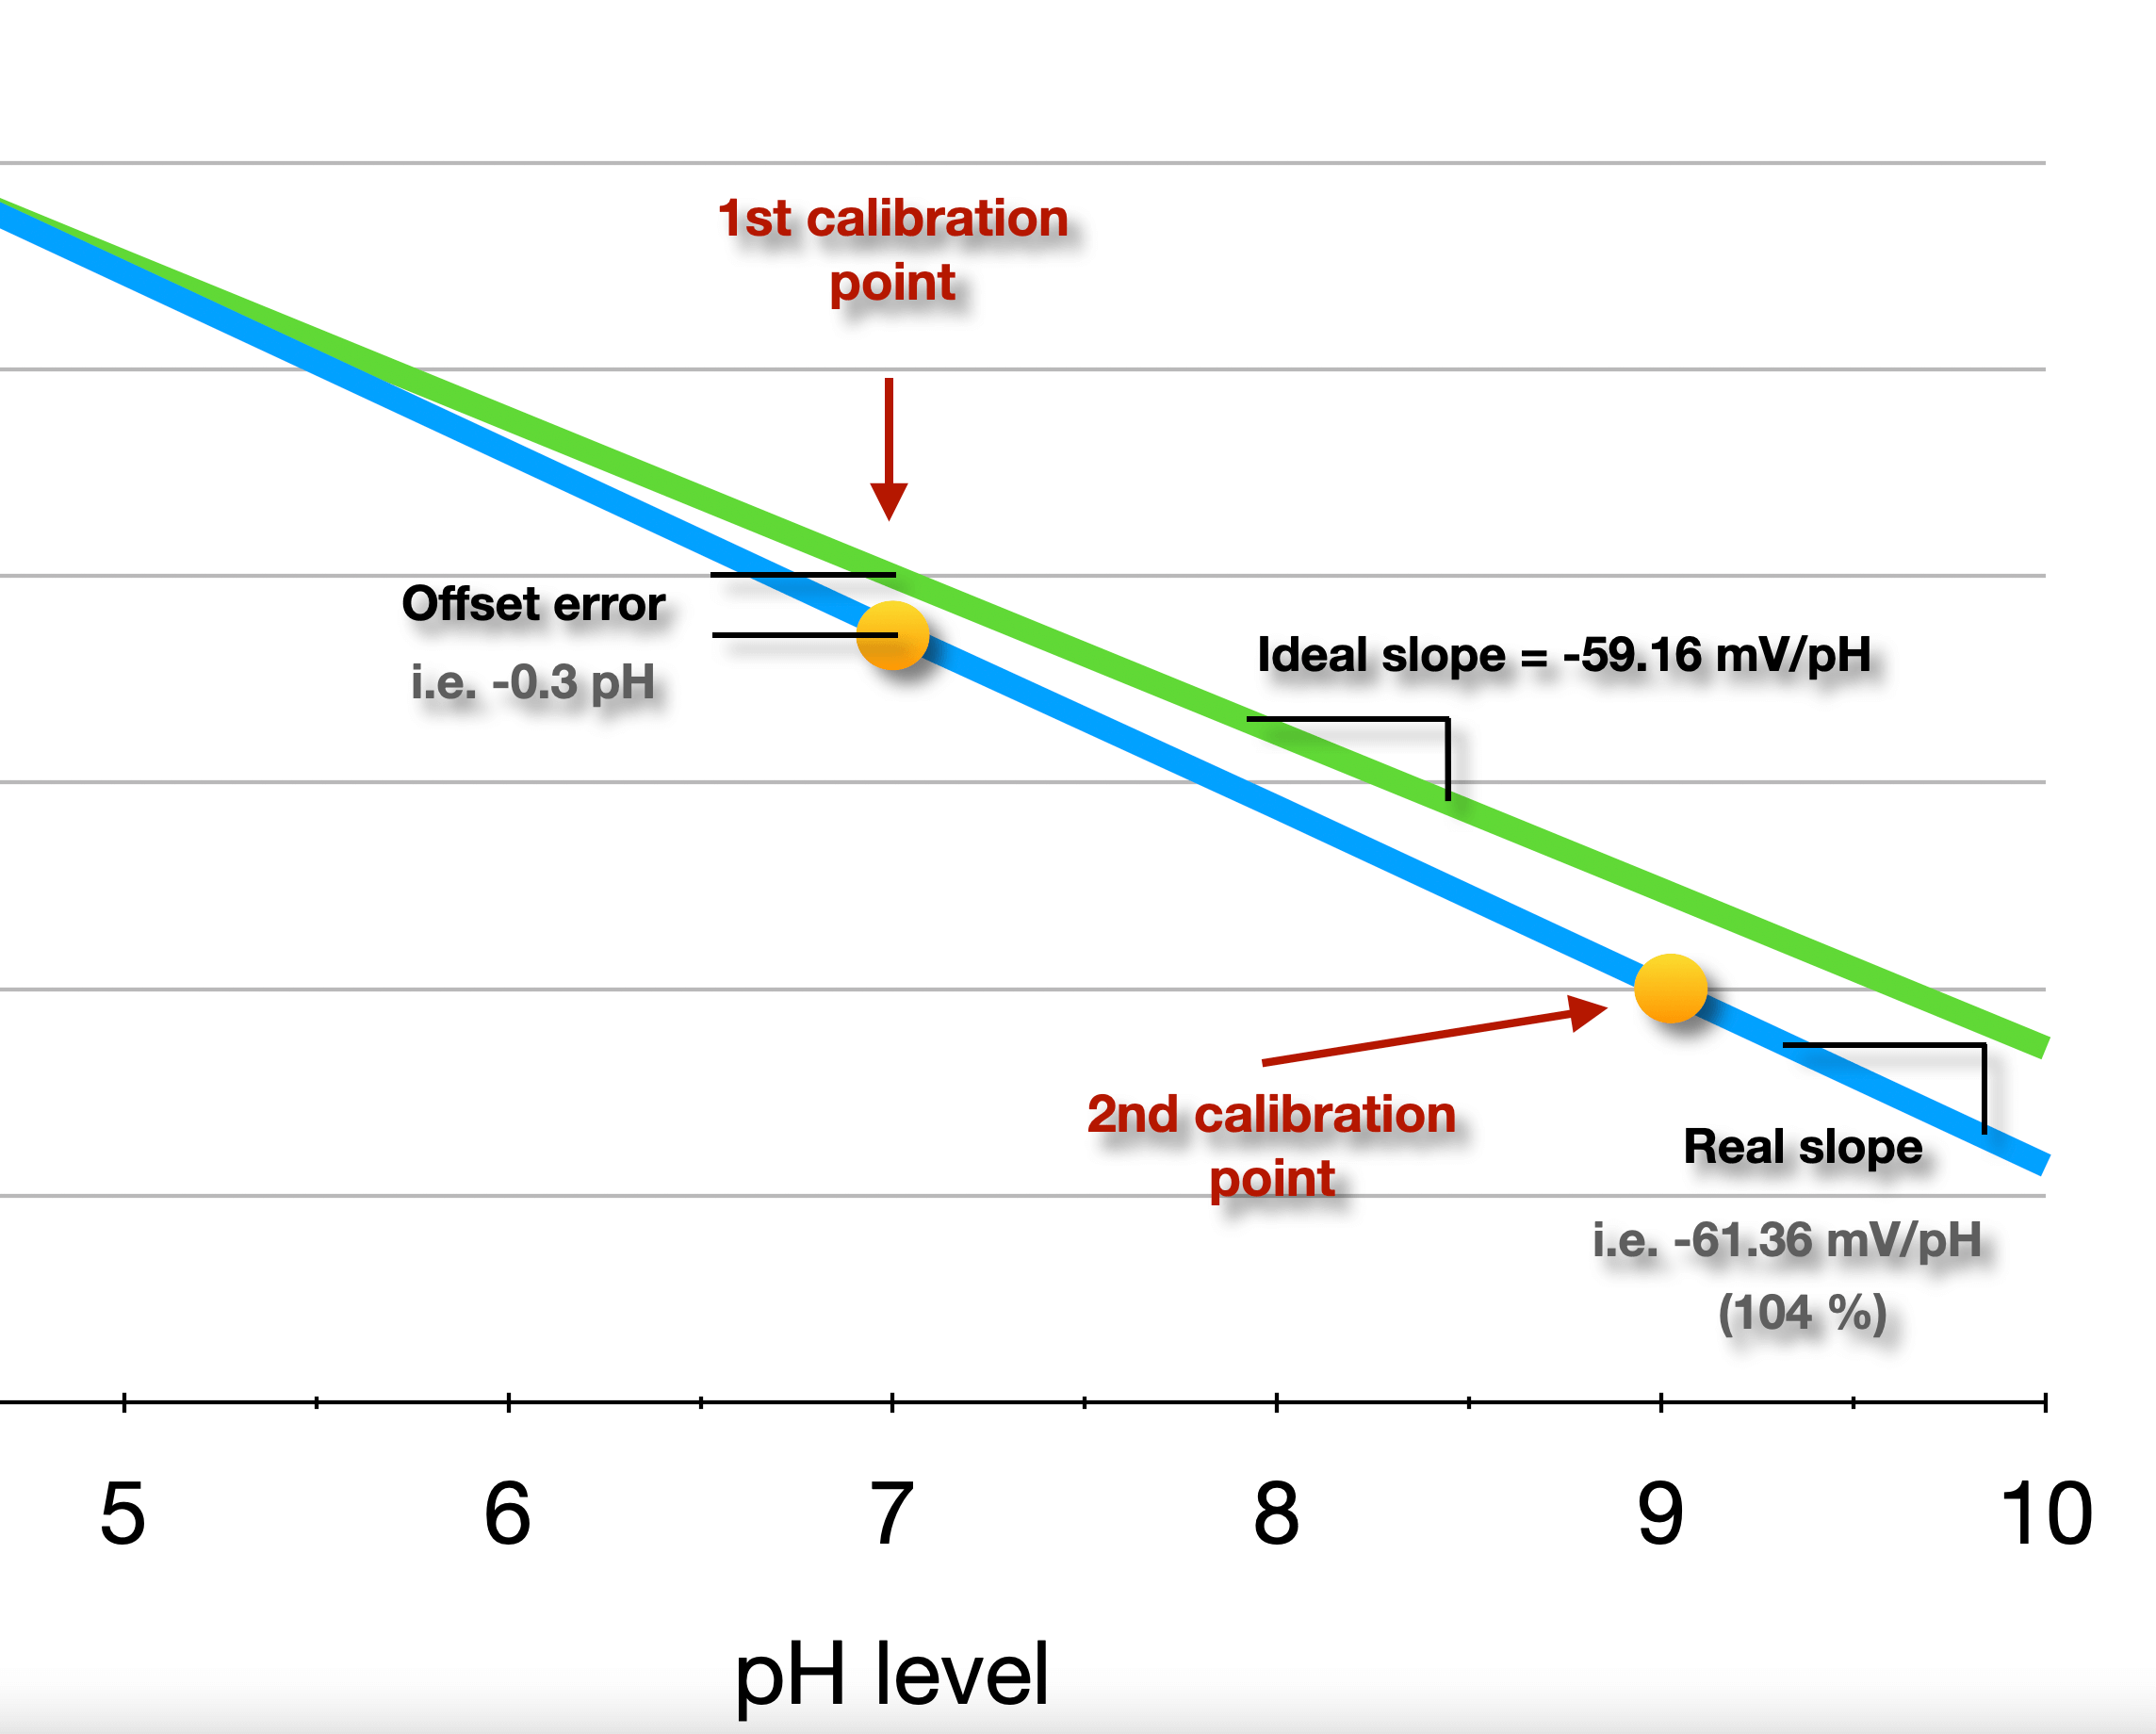
An ideal pH electrode will output exactly 0 mV at pH = 7.00, and present a slope of -59.16 mV/pH at 25ºC. As with any sensor, real pH probes will always differ from the ideal response, and their response will change over time due to degradation of the glass interface, contamination, and other effects. Therefore, in order to ensure accurate, repeatable measurements, it's important to perform regular calibrations of the probe.
The two-point calibration adjusts the meter at two different pH values, thus the meter has been adjusted so that its response is accurate at more than one point along the linear equation. The second calibration point is selected on the basis of the type of solution (acidic or basic) to be measured so that the linear response can be established.
The graph below shows an example of a real probe, where the first buffer is 7.00 and the 2nd is 9.01. The calibration results gave an OFFSET of -0.3 pH (how far the probe output is from the ideal 0 mV with a pH of 7.00), and a SLOPE of -61.36 mV/pH at 25ºC (often indicated as a percentage of the ideal value, in this case 104%).
The calibration algorithm calculates the OFFSET and SLOPE parameters (after applying automatic pH temperature compensation), and store them in permanent memory. These parameters will be then used to output the corrected pH measurements.
When measuring acidic solutions, use a buffer that is acidic, pH < 7 (a pH = 4.00 solution is common). When measuring basic solutions, use a buffer that is slightly basic, pH > 7 (pH = 9.00 or 10.00 solutions are common).
Calibration Steps
1: start calibration mode
Interactive mode
In order to start the calibration, enter 'K'Enter in a serial terminal window. In case that the command is sent through the CLI: $ printf 'K\n' > /dev/ttyACM0 (a 2nd terminal can be used to listen to the replies cat /dev/ttyACM0)
The following information is printed:
**** Electrode calibration procedure (2 points -> linear) ******
 -- Options: (pH @ 25ºC) -
 ------------------------------------------------
'1': [1.68  4.01  7.00  10.01       ] Mettler US
'2': [2.00  4.01  7.00  9.21  11.00 ] Mettler Europe
'3': [2.000 4.00  7.00  9.00  12.00 ] Standard Merck buffer
'4': [1.680 4.008 6.865 9.184 12.454] DIN19266:2000
'5': [1.09  4.65  6.79  9.23  12.75 ] DIN19267
'6': [1.680 4.003 6.864 9.182 12.460] Chinese
'7': [2.00  4.01  7.00  10.00       ] Technical buffer
'8': [1.679 4.008 6.865 9.180       ] JIS Z 8802
--------------------------------------------------
-- Select Buffer Set [1-8] -
2: select calibration set
Select a set of standard buffers from the table containing the 2 solutions to use.
i.e.: '2'Enter
Selected Set: 2
3: rinsing
Rinse the electrode in deionized water for a few seconds.
4: first buffer solution
Tip: Buffer temperature
In order to ensure the best calibration results, dip both the pH probe and the temperature probes into the buffer solution, so the automatic temperature compensation algorithm gets the right input, specially if the buffer is not exactly at room temperature (for instance, if the buffer was stored in a separate room from where the calibration is being performed).
Dip the probe on the 1st buffer (is OK to stir only for 2-3 seconds and leave the electrode still while the voltage readings stabilize).
Automatic buffer detection
The calibration algorithm will monitor the measured value, compare it with the selected buffers set, and select the buffer with the best fit.
 -- STEP 1: Rinse the probe with deionized water and insert in 1st buffer --
* Starting automatic buffer detection... [Enter 'C' to Cancel]

[\] +169.4 mV - Wait for value to stabilize and enter 'N' for next step
Settling time
Depending on the state of the probe, it could take up to a few minutes for the voltage readings to stabilize. The settling time is notoriously increased when the probe is aproaching its end-of-life and it might need to be replaced.
Once that the reading is stable, enter 'N'Enter to move to the next step (or 'C'Enter to Cancel).
* 1st calibration point - [Buffer detected: 4.01, measured: +169.3 mV (4.04 pH)]
Verify that the detected buffer equals the solution used before continuing.
5: rinsing
Remove the electrode from the buffer and rinse it again in deionized water for a few seconds.
6: second buffer solution
Dip the electrode on the 2nd buffer and wait for the voltage readings to stabilize...
Enter 'N'Enter to get the 2nd calibration point...
* 2nd calibration point - [Buffer detected: 7.00, measured: -2.86 mV (7.05 pH)]
Tip: Don't reuse buffers
In order to reduce the risk of contamining the buffers, and therefore obtaining erroneous calibration values, don't store the used buffers back in the container, discard the solutions after using.
7: confirm and save parameters
Check the calculated calibration parameters (Slope and Offset).
*** Calibration Finished: SLOPE: 1.011 (101.1% percent), OFFSET: 0.30 ***

 [Enter 'W' to confirm and save to Flash (override previous calibration), 'C' to Cancel...]

 Saving calibration data to Flash...
Verifying calibration
To make sure that the calibration went well, rinse the electrode again in deionized water and dip it on the first buffer. Check that the value is within a reasonable range, if the readings are far off, try repeating the calibration procedure. Also, check the calculated parameters: generally, a slope between 85% and 105% and an offset of ±30 mV (±0.5 pH) is acceptable. Outside of this range, you may need to replace your pH probe.