Firmware update
uThing::VOC™ is Open Source 📖
The fimrware for the uThing::VOC™ is Open Source, with a MIT License, so you are free to use it and modify it as long as you keep the reference to the original work. Please check the GitHub repository if you are interested.
Either if you want to update the firmware to the latest version, you are concerned about security and prefer to build your own binary, or you want to modify the source code and build a custom version (build instructions in the repo), there are 2 ways of flashing the Firmware:
A: Using USB-DFU (Device Firmware Update)
If the intention is to simply update the firmware, or just program a slightly modified version without the need for extensive debugging / testing, the MCU can be re-flashed via the USB port by using the on-board USB-DFU capability.
The programming process via USB requires two steps:
-
Booting the dongle into USB-DFU mode:
The MCU has a special Bootloader in ROM memory, which provides the functionality of DFU. In order to start this process, the MCU has to be reset into DFU-Bootloader mode. This is accomplished by powering-up the device while holding the BOOT0 line (pin #44) into logic-high level (3.3V / VCC).
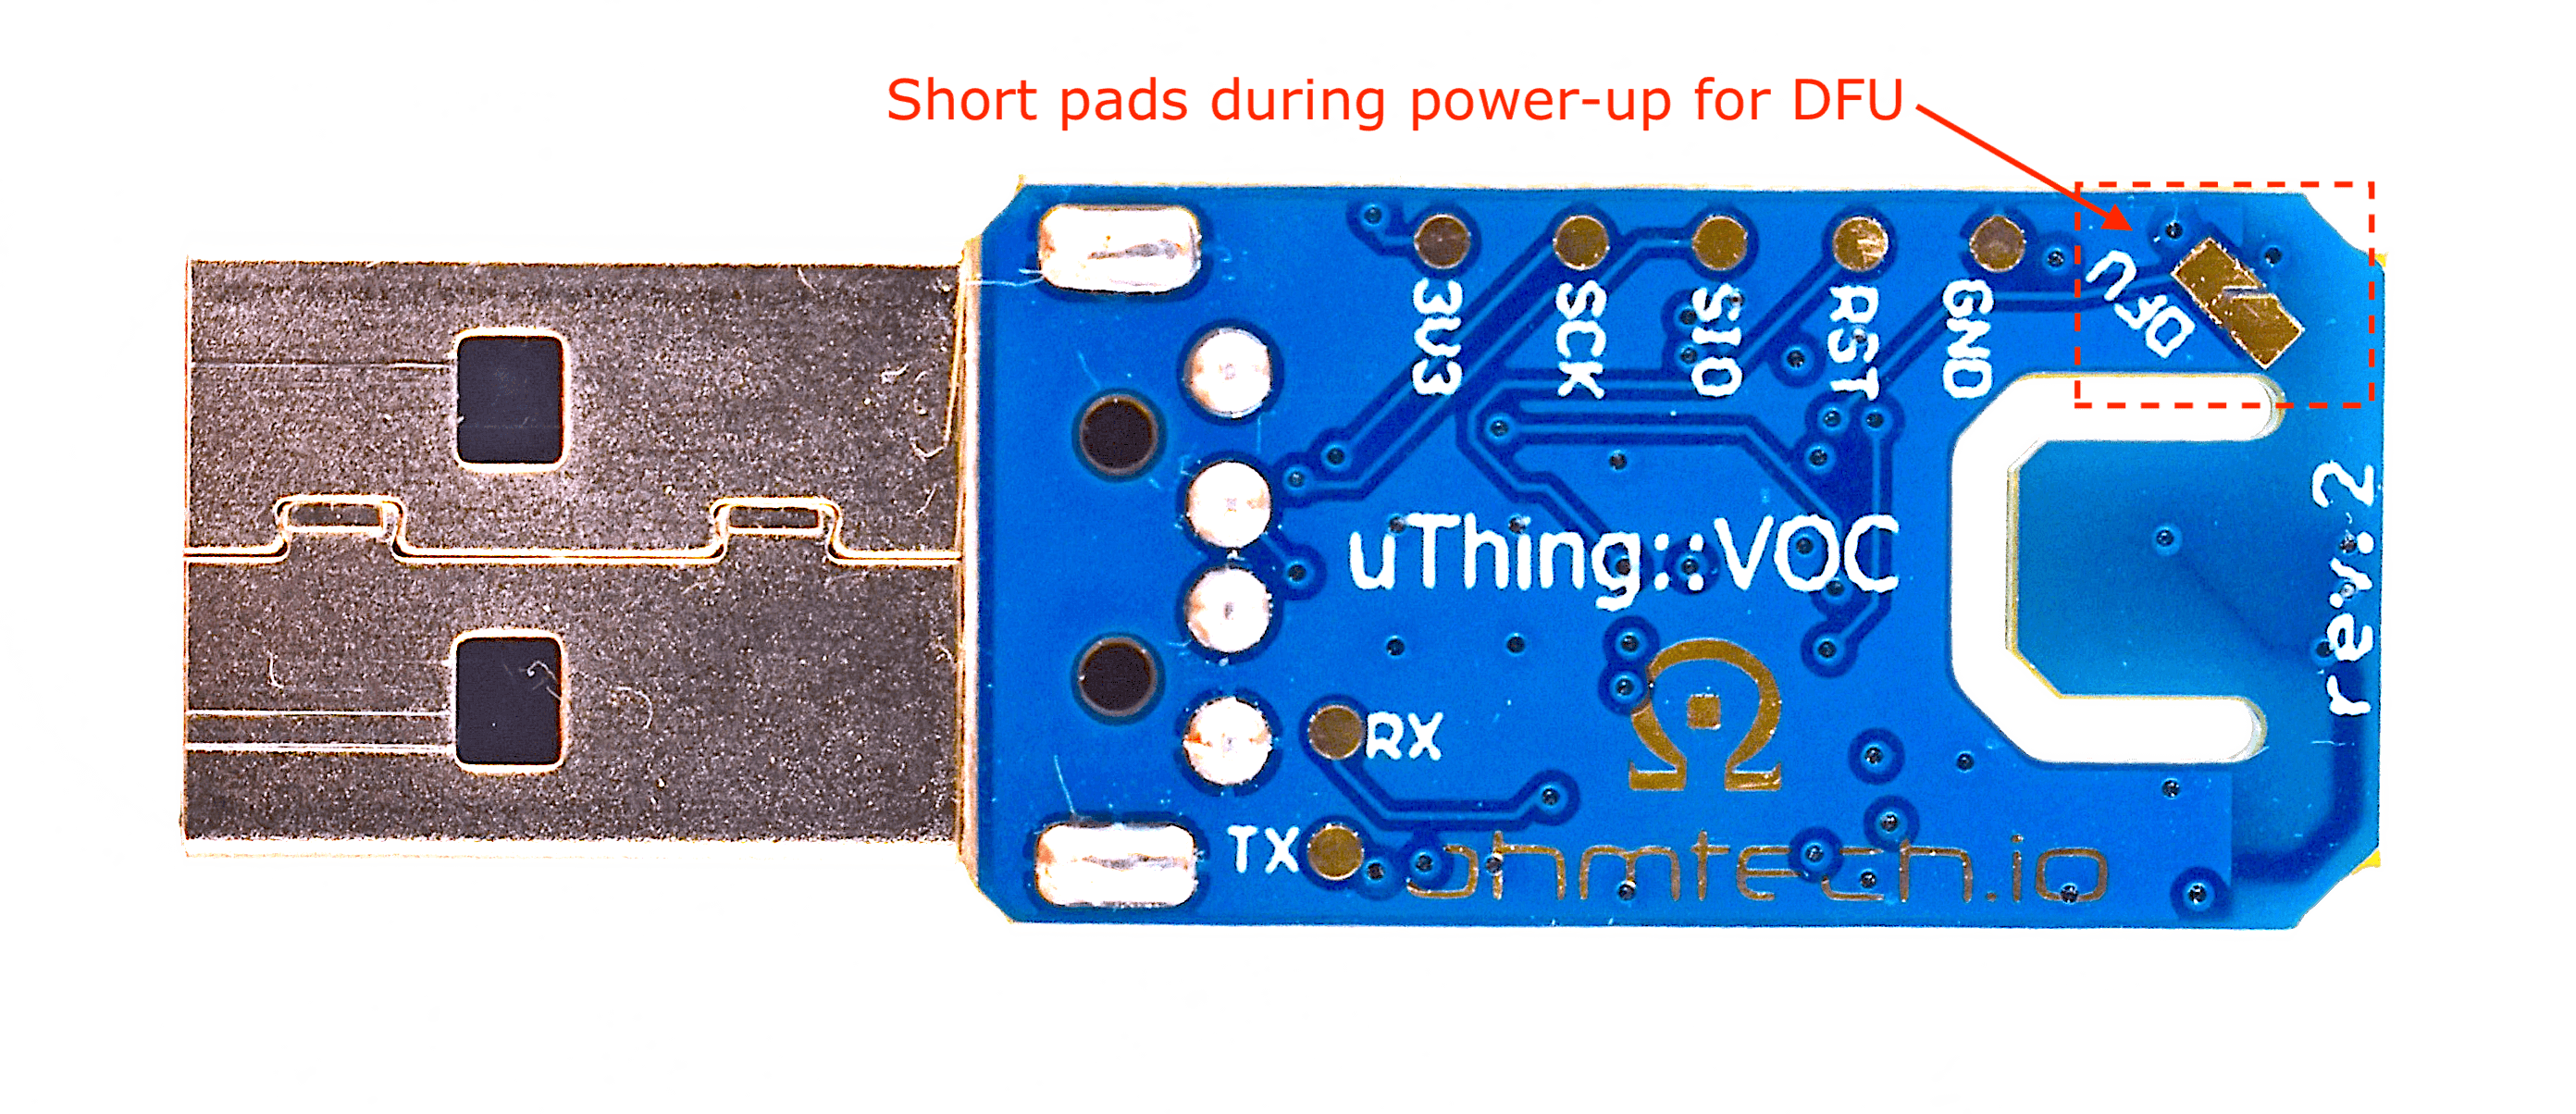
To do this, unplug the dongle, hold a jumper (conductive material, like a piece of wire, screwdriver, paper-clip, etc.) between the DFU indicated pads with the precaution of not short-circuit any other pin, and plug the device into the USB while shorting these 2 pins. In this case, both status LEDs should stay OFF. The jumper can be then released.
To verify if the Bootloader has enumerated the MCU this time as a USB-DFU capable device, use the command
lsusb.This is the displayed information in MacOS:
Bus 020 Device 008: ID 0483:df11 STMicroelectronics STM32 BOOTLOADER Serial: FFFFFFFEFFFFIn a Debian distribution:
Bus 001 Device 004: ID 0483:df11 STMicroelectronics STM Device in DFU ModeIn Windows, the Device Manager shows a “STM Device in DFU Mode” under USB devices.
-
The DFU-UTIL command:
DFU-UTIL is a CLI application available for MacOS, Linux and Windows. In the Unix-based systems it’s available in the usual packet managers (Homebrew, apt-get, etc.). The version v0.9 is the latest one at the moment of writing and it’s been tested successfully on Debian 10 and MacOS.
To perform the firmware programming, issue the following command, where “USBthingVOC.bin” is the application to flash in .bin format (no HEX or ELF is supported by DFU-util):
Note: In Linux, the dfu-util may need to be run as root, or a udev rule and permissions should be added.dfu-util -a 0 -D USBthingVOC.bin --dfuse-address 0x08000000:force:mass-erase:leave -d 0483:df11If everything went right, the output should look like the one below:
Opening DFU capable USB device...
ID 0483:df11
Run-time device DFU version 011a
Claiming USB DFU Interface...
Setting Alternate Setting #0 ...
Determining device status: state = dfuIDLE, status = 0
dfuIDLE, continuing
DFU mode device DFU version 011a
Device returned transfer size 2048
DfuSe interface name: "Internal Flash  "
Performing mass erase, this can take a moment
Downloading element to address = 0x08000000, size = 103880
Erase       [=========================] 100%       103880 bytes
Erase    done.
Download    [=========================] 100%       103880 bytes
Download done.
File downloaded successfully
Transitioning to dfuMANIFEST state
B: Using a debug probe connected to the SWD pads
Note: This is the best way to go if you want to do modifications and debugging with GDB.
In this case, it's necessary to solder the correspondent signals to the SWD port on the board bottom-side (do not forget to connect the 3V3 power signal or JLink won't detect the target).
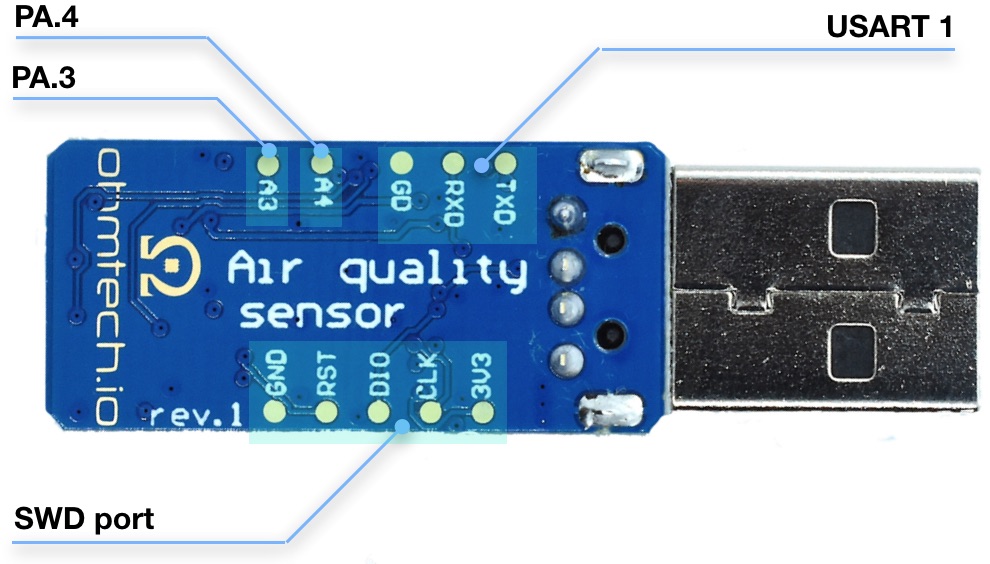
| ID | Signal name | Comment |
|---|---|---|
| GND | Ground | System ground reference |
| RST | nRESET | Target reset, JTAG RESET line |
| DIO | SWDIO | corresponds to the JTAG TMS line |
| CLK | SWCLK | corresponds to the JTAG TCK line |
| 3V3 | VCC/VTref | Target reference voltage (it’s used by most debug probes to check target power and drive level converter references) |
The flash script for Segger's J-Link™ is already included in the repository, so you just run:
$ make flash
Alternatives to J-Link
Many different debug probes could be used instead (as the ones based on FT2232/OpenOCD or ST-Link™).